
TUTORIAL: The Essentials of Digital Marketing
Digital marketing is a form of communication that exists between businesses and consumers. When you properly utilize SEO, content creation, social media, and email campaigns, you’ll offer your consumers a new and improved way to communicate with your company—and that’s the magic of this digital age.
It may be magical, but now that 77 percent of Americans flock to the internet daily, digital marketing is also essential for your business success. Just because it’s essential, though, doesn’t make it a simple process.
Looking to improve your next digital marketing campaign or advise a client? Use the following steps to ensure that you stay digitally savvy.
Digital Marketing Essentials Step 1: Run an SEO Audit
To find success online, you need to be familiar with the intricacies of SEO. The best way to grow this familiarity is to run an SEO audit on your own platform.
SEMrush makes it easy to run an SEO audit, but there are several other tools available to you, including:
- Raven Tools
- DeepCrawl
- Site Condor
If you’re running an SEO audit through SEMrush, you’ll need to do as follows:
- 1. Create a project on the platform dashboard.
- 2. Enter a Project Name.
- 3. Click “Site Audit.”
- 4. Change the “default” parameter to “limit of checked pages” so that all your pages can be assessed.
Once you do, SEMrush will generate your site health based upon the number of checks passed and checks failed. It’ll present you with this information in the form of a bar. The green portion of the bar reflects pages that are “healthy,” or effective. Orange-marked pages have issues, and red pages are broken entirely. SEMrush will also provide you with a list of the most crucial errors for you to take care of immediately. These include duplicate pages, lost meta descriptions, and broken links.
Remove Your Duplicate Pages
Based upon the information SEMrush or a similar tool provides, you need to remove duplicate content from your website. You can do this in several ways.
- rel=canonical: Use this HTML tag on the page you want Google to index. When you do, it’ll ignore the duplicate pages in favor of the “canonical page.”
- 301 Redirect: Many WordPress plugins allow you to redirect the audience attention from a duplicate page to a canonical page.
- Passive Parameters: You can also let Google know that one of your duplicate pages is “passive” by diving into Google’s Search Console and adjusting URL search parameters.
Click “Add parameter” and enter the URL of the duplicate page, selecting “No: doesn’t affect page content.”
Once you click “Save,” your duplicate content will no longer register with Google’s crawlers.
Remove Dead Links
If you have dead links on your website, you can use Google’s Search Console to identify those lost links and re-affiliate them with live content.
- 1. Log into your Google account.
- 2. Through Google Search Console, click on “Crawl Errors,” under the diagnostics tag.
- 3. Click “Not Found.”
With that, you’ve found the dead links and mobile 404s on your platform. You need to then edit those links manually using CTRL+K or the control panel.
Rewrite Lost Meta Descriptions and Tags
As described earlier, you can craft your meta descriptions, title tags, and other SERP content for your platform. If SEMrush tells you that you have missing meta descriptions, you’ll need to replace them.
You can code in a meta description like so:
<meta name=”description” content=” Your Page Description Goes Here.”/>
Digital Marketing Essentials Step 2: Emphasize the Importance of Social Media
You can’t run a digital marketing campaign without utilizing social media. The four biggest names – YouTube, Instagram, Twitter, and Facebook – will all drive your marketing toward a welcoming audience. Just make sure you’re using them appropriately.
Get started with a business account on one or more of the following:
YouTube Business
To create a YouTube channel for your business, take the following steps:
- 1. Create a Google account (don’t affiliate your work email with your YouTube account, even if you use Gmail).
- 2. Visit YouTube.
- 3. In the upper right corner, click your avatar.
- 4. Click “My Channel.”
- 5. Click “Use a business or other name” below your listed channel name.
- 6. In the text box that appears, create a name for your business.
- 7. Click “Create.”
From here, you’ll be able to customize your business’ channel with personalized headers, icons, and an information-rich “About” section.
If you want to add other parties to your business’s YouTube channel, you need to:
- 1. Click your avatar in the upper right corner.
- 2. Click “Settings.”
- 3. Select the “Add or remove managers” link under the “Managers” section.
- 4. Click “Manage Permissions.”
- 5. In the box that appears, use the icon in the upper right corner to invite your work affiliates to join your channel.
Instagram Business
Instagram is a picture-heavy platform that demands aesthetic appreciation. To create a business account on this platform, take the following steps:
- 1. Download the Instagram app for your phone.
- 2. Sign up for an account with a work-affiliated email address, OR connect your business’ Facebook account to the platform.
- 3. Enter your preferred contact email, phone number, and address for your business.
- 4. Click “Done.”
Now, you’ll be able to access your page’s analytics courtesy of the graph icon near the top of the app.
Twitter Business
While Twitter demands brevity, it houses a stunning 336 million monthly active users. To create a business account on Twitter, take the following steps:
- 1. Go to Twitter.com.
- 2. Click “Sign Up.”
- 3. Enter your name, preferred email, and a chosen password.
- 4. Click “Join.”
- 5. Click “Create My Account.”
- 6. Cultivate a timeline.
- 7. Confirm your email address.
- 8. Upload a profile picture (700 MB maximum file size).
- 9. Save your changes.
Facebook Business
Facebook has the most in-depth business managers for pages affiliated with corporations and agencies. To create and utilize a Facebook business account to your advantage, take the following steps:
- 1. Go to business.facebook.com/create.
- 2. Click “Create Account.”
- 3. Enter your name and email address of choice.
- 4. Confirm your existence on Facebook by entering your pre-existing Facebook login credentials.
- 5. Choose a business type: local, company, brand, artist, entertainment, or cause.
- 6. Identify a sub-category for your business.
- 7. Click “Get Started.”
- 8. Add media to personalize your page.
- 9. Create an information-rich description and compelling username.
- 10. Engage with interested consumers.
Alternatives
There are other platforms, though, that you can take advantage of to avoid social media saturation. The more saturated a platform such as Facebook is with users and advertisers, the less effective your business’ ads are going to be.
Consider branching your next marketing campaign out onto these additional social media platforms:
Digital Marketing Essentials Step 3: Build a Content Queue
Choosing the social networks you want to utilize the most becomes easier once you’ve identified your business’ voice and preferred posting style. You can capitalize on the aforementioned versatility through the following means:
- 1. Write engaging, keyword-rich copy for your profiles.
- 2. Identify your posts’ tone: funny, serious, informative, etc.
- 3. Set a posting schedule and uphold it.
- 4. Assess your success with the tools provided to you by the platform of your choice.
- 5. Engage with your audience on an individual level.
These tips hold true for the whole of your content-creation process. That said, not all content is text-based. You can begin generating a content queue for your digital marketing campaign using any of the following mediums:
- Blog Posts: Blog posts personalize your business and offer your consumers resources to revisit, as long as they’re information-rich and not stuffed with keywords.
- Videos: With consumers taking in more video content today than they have ever before, the video offers your audience a break from walls of text. Whether you craft a video poking fun at your business or one that’s strictly informative, you need to use the visuals and audio to your advantage or else risk creating a Generic Brand Video.
- Infographics: Like videos, infographics offer the eye a break from the text of a blog post. Use infographics to more easily present complex data or statistics.
- Case Studies: While case studies are highly individualized, their personalization will appeal to your audience and provide them with social proof of your product’s effectiveness.
- White Papers: White papers serve as long-form content designed to draw in business leads. These can include e-books, surveys, PDF files, and downloadable content.
- Interviews: Use your professional network to find podcasts, external blogs, or other mediums through which you can talk about your work with other people inside or outside of your industry. By sharing your voice through already-established mediums, you’ll lend credibility to your business and content.
- Social Media: See the previous section for different posting avenues.
Digital Marketing Essentials Step 4: Take Advantage of Email
Despite what you may have heard, email isn’t a dying medium. Digital marketing requires you to invest time and resources into the creation of a strong email marketing campaign if you want your business to flourish.
While you can organize and operate an email marketing campaign from an unaffiliated business account, it’s significantly easier to do so from an email marketing tool. The tools you have available to you include:
- Mailchimp: This tool is one of the few that allows smaller businesses to create an email marketing campaign at no cost. The free plan allows you to send 12,000 emails per month but caps you at 2,000 subscribers. From here, email marketing plans range from $10 to $250 per month, with costs changing based upon the number of subscribers your campaign has.
- Sendinblue: Like Mailchimp, this platform offers users access to a free email marketing program, albeit one that’s more limited than those of its peers. Unlike those peers, Sendinblue charges users based upon the number of emails they send per day, as opposed to subscriber count. Sendinblue is based in Europe; thus, regardless of where you are, you’ll be charged for your needs in euros. Costs range between €19 and €129 per month, with the free plan allowing you to send 300 emails per day and 9,000 per month to an unlimited number of contacts.
- Keap: This tool doubles as an email marketing interface and a segmentation asset, reminding you to break down your audience and send differently targeted emails to different consumers. Prices start at $79 per month for an account with discounts available to new subscribers. These plans break down into Grow, Pro, and Infusionsoft categories with different and more complex tools made available with each upgrade.
You’ll also need to identify the type of marketing campaign you want to utilize. Discuss the various types of campaigns listed below with your support staff and/or.clients to determine which fits best with your business’s ambitions.
- Newsletters: Newsletters focus on one particular topic. They draw an existing consumer audience back to your platform after they’ve visited once or made a purchase. If you want to build long-lasting relationships with your consumers, utilize a newsletter.
- Announcements: If you want your email marketing campaign to generate immediate sales, send your audience announcements. These emails let your audience know about sales, stock updates, and specific coupon codes that could save them money.
- Event Invitations: If you’re hosting a real-time event or a Livestream online, events sent through an email marketing campaign are a great way to generate interest. More importantly, they let your audience know when and where they’ll have the opportunity to connect with you.
- Welcome Emails: Do you want to welcome new subscribers to your newsletter or new members to your loyalty program? Welcome emails are a great way to start building a personal connection with your consumer audience.
- Nurture Emails: Nurture emails build upon the leads your marketing campaigns are in the process of establishing. Offer continual value to your would-be consumers through blog posts, listicles, and other long-form content as advertised through nurture emails, and you’ll see more traffic on your platform.
Promotions & Follow Ups :
- Promotions: Let your consumers know whenever you’re hosting a sale, releasing a coupon, or taking in new products. You can even send these emails out a day early to subscribers to build up consumer excitement!
- Triggered Emails: Preset emails to send after a consumer interacts with a certain element of your site, and you’ll encourage him or her to revisit your platform. For example, if you want to encourage a user to purchase one of your products, use platform automation to send an email after he or she views said product.
- Post-purchase Follow-ups: Check in with your consumers after they’ve made a purchase to see how they feel about your checkout process. You can even prompt your consumers to leave reviews with follow-up emails, encouraging greater engagement even after a sale has been completed.
- Abandoned Cart Emails: Abandoned cart emails remind your consumers of products they were once interested in. These emails can woo consumers back to your platform.
- Multi-platform Engagement Emails: Do you operate e-commerce businesses over multiple websites? Encourage your consumer audience to explore all your operating facets! Share information about your other platforms with cross-platform engagement and let your consumers know that you can attend to more than just a niche need.
- Encouragement Emails: If a consumer has shown interest in your platform but hasn’t committed to a sale yet, encouragement emails are ideal. Set up these emails to appear in the inboxes of long-time bystanders along with a coupon or targeted advertisement and you’ll likely see a financial commitment in the near future!
Decide early on whether you want to automate your email marketing campaign. This kind of automation doesn’t remove humans from the creative process. Instead, it makes it easier for your business to respond to email leads.
There are two different ways to utilize email automation and email automation campaigns:
- Simple campaigns consist of a few emails sent out to a smaller list of recipients. Consumers typically sign up for these emails after participating in a contest, making a purchase, and so on.
- Complex email automation campaigns will have varying chains and work similarly to “choose your own adventure” books. The paths that these campaigns take will vary based upon consumer needs. For example, say your first email encourages consumers to download your platform’s coupon book. Consumers who do will receive one type of email, whereas consumers who don’t may need a second round of encouragement. These campaigns take a lot of thought, but they feel more personal.
Digital Marketing Essentials Step 5: Make Sure You’re Mobile Compatible
With your emails addressed, focus your digital marketing campaign on the medium potential consumers will most frequently be using to view your content and products.
Over half of your consumers utilize their mobile phones to grow more familiar with the businesses they shop at. If you want to adequately build a strong digital marketing strategy, then you’ll need to ensure that your platform, content, and advertisements are mobile-compatible.
You can check your site’s mobile compatibility with Google’s mobile-friendly checker tool. Enter your URL into the tool’s search bar. After you’ve clicked “Test URL,” Google will display your site’s mobile usability in clear terms. It’ll either state that no usability errors were detected or outline the site elements that your average phone won’t be able to process.

The most common errors you’ll run into are:
- Blocked image files, JavaScript, or CSS
- Unplayable content
- Failed redirects
- Mobile 404s
- Pop-ups
- Slow load times.
Resize Blocked Files
If your images or other architectural elements aren’t appearing on a consumer’s mobile browser, then you may be experiencing an issue with the size of your content. The easiest way to fix this is to code an auto-adjust into your platform that’ll resize your images and other elements to fit a mobile screen.
You can code this resizing for images as follows:
img {
width: auto ;
max-width: 100% ;
height: auto ;
}
Alternatively, you may need to ensure that Google’s crawlers can process your JavaScript or CSS. Use its URL Inspection Tool to understand how crawlers view your content. This tool will also offer you individualized solutions that’ll improve your image processing.
Modify the Files of Unplayable Content
If Google’s Mobile Friendliness Checker reveals that some of your content is unplayable, you may need to switch the standard tags you’re using for your videos. Flash is no longer the primary tag here.
Re-network Failed Redirects and Mobile 404s
Google will also alert you if you have any failed mobile redirects or mobile 404s on your platform. If you have either, you’ll be able to use the aforementioned Google Search Console to locate the missing link and properly associate it with its smartphone match.
- 1. Log into your Google account.
- 2. Through Google Search Console, click on “Crawl Errors,” under the diagnostics tag.
- 3. Click “not found.”
With that, you’ve found the dead links and mobile 404s on your platform. You then need to edit those links manually using ctrl+k or the control panel accessed via your right mouse button.
If one of your desktop pages doesn’t have a comparable smartphone page, then don’t allow users to click on it. Instead, have that link redirect to your home page.
Reorganize Your Pop-ups
While you may be making money from having advertisers on your platform or trying to better interact with consumers who come to your site, pop-ups are a no-go on mobile-friendly platforms. To remove pop-ups from your mobile site, you can once again turn to Google.
Google Ad Experience Report elaborates on the site layout of the advertisements on your desktop and lets you see how you can better integrate these ads on a mobile platform.
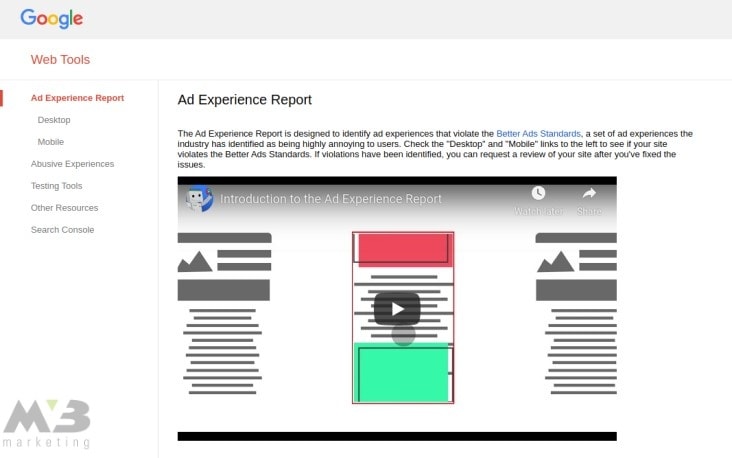
- 1. Visit Google’s Ad Experience Report.
- 2. Under “Ad Experience,” select either Desktop or Mobile to review a report for your site on both platforms.
- 3. Your site will be reviewed, and you’ll receive a rating. “Failing” means that you need to reorganize the advertisement structure on your platform.
Google Ad Experience Report will address the troubling ads on your platform, naming them in its final report. You need to click on “view examples” in the “what we found” column to identify the dialog box with your ad’s description and page URL.
Integrate Responsive Design
“Responsive design” refers to platform settings that allow your platform to respond to a user’s chosen method of viewing by shrinking or expanding the content in question. You can program responsive design into your CSS by neglecting pixel measurements and instead utilizing percentages. For example:
#body {
width: 40%;
}
Given the code above, the body of a piece of content on your site will shrink to take up 40 percent of a visitor’s screen, regardless of what mode he or she is using. You need to know basic CSS to take advantage of Responsive Design.
Digital Marketing Essentials Step 6: Utilize Online Analytics
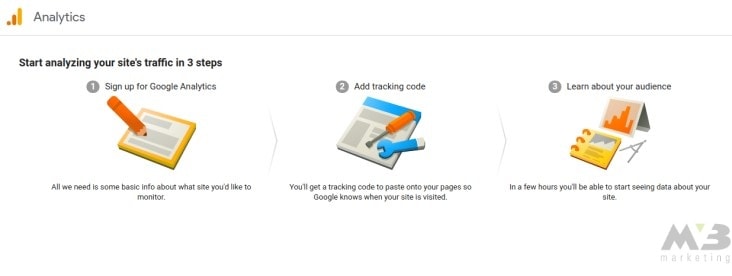
While Google Analytics is the most popular analytics tool you can use to track your platform’s digital footprint, it’s not the only one. Other analytics tools include:
Because Google Analytics is designed to be easy to use, however, we recommend integrating it into your existing platform. To do so, you’ll need to:
- 1. Sign in to Google Analytics using your Gmail account.
- 2. Click “Admin.”
- 3. Find the “Account” column and choose the Gmail account you want to be affiliated with your platform.
- 4. Find the “Property” column.
- 5. Select “+Create Property.”
- 6. Choose between using a website or a mobile app.
- 7. If you choose to track a mobile app, select “Firebase” under the “Tracking Method” column. Once you’ve selected your chosen app, click the “Connect App.”
- 8. If you choose to connect a website to your Analytics, enter your website’s name.
- 9. Enter your URL.
- 10. Select an industry category.
- 11. Select a reporting time.
- 12. Receive your tracking ID.
A collaboration with Google Analytics will enable you to more effectively gauge the success of your digital marketing campaigns. You’ll be able to collect and analyze data patterns based upon the following:
- Interests of Audience
- Audience Location
- Audience Behavior
- Technology Used to Access Your Site
- Benchmarking
- User Flow
- Bounce Rates
- Acquisitions
- Site Behavior
- Site Speed
- A/B Testing
- Conversions
You could do all that. Or, you could reach out to MV3.
Whether you’re looking to master the world of digital marketing or you want digital-age technology to boost your platform’s appeal, our team does it best. Furthermore, get in touch and let us help you achieve your desired goals today.


