How to remove Google unnatural link penalty

How to Build a Backlinking Strategy to Grow Your Business

Link building is a popular SEO technique that, when done correctly, can help your web pages appear higher on search engine results pages. Doing this will usually lead to more traffic and conversions on your website, as gaining higher authority from a backlink will boost your brand value.

Earning these backlinks is hard to do, which is why many website owners resort to black hat tactics that earn them a link penalty. A link penalty can negatively affect your link-building efforts, meaning that it’s crucial to remove these penalties by rectifying your mistakes. Removing a Google penalty for unnatural links means understanding why you got that penalty and taking proactive steps to remove it. Here’s an in-depth guide to Google Link Penalties and how to remove them from your website.

Why Have I got a Google Link Penalty?

Google has a job to do. Its primary focus is on giving its users the most relevant and high-value results for every single query. When a website tries to manipulate the search results, it’s causing potential damage to the Google brand. After all, if a search engine gives you nothing but useless results, then people will stop using it. To ensure that a search query always gets the best results for its users, Google uses highly complex algorithms – they constantly update these. Search bots crawl through and index websites continuously to ensure that Google knows what those web pages are about and how much value they have. Unfortunately, people try to game the system, which ends with an automatically generated or manually handed out link penalty.

It’s not just link penalties that you can suffer from. You will often get a Google penalty if your website has any of the following:

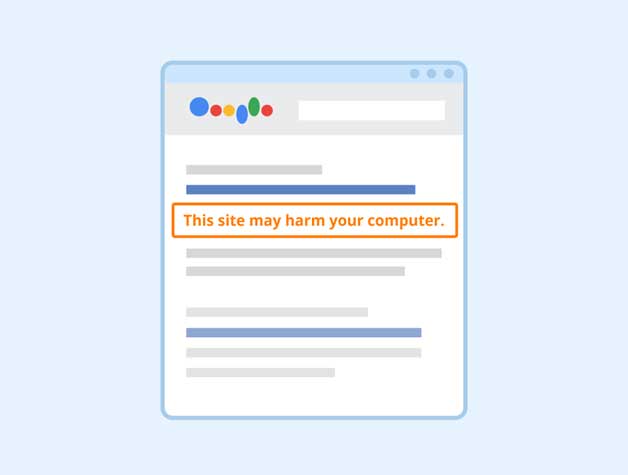
There are many more reasons why you might get a Google penalty, but the cause is always the same: website owners are trying to game the algorithm in a way that harms the user experience.

harm

Recovering from a Google Link Penalty

There are two different types of Google penalties. The first is a manual one, while the second is algorithmic.


Manual Penalties

Employees working for Google will hand out manual penalties whenever you do something wrong. Buying links is one of the most common reasons for a Google link penalty, but you can receive these penalties for any actions that break Google’s terms of service. The results are usually more severe when you get a manual penalty, and the search engine will usually remove you from their index. That means you will suddenly be invisible online. To be reindexed, you have to appeal to Google.


Algorithmic Penalties

An algorithmic penalty is one that you receive automatically – it doesn’t involve any human employee of Google. They often occur when Google implements an algorithm change, and the search engine starts to rank websites in slightly different ways. Keyword stuffing and slow loading times can cause an algorithmic penalty. Also, a lack of inbound links can be a reason, as can too many links! An algorithmic penalty doesn’t usually remove you from the Google index. Instead, it means that your website starts to appear in a lower position on SERPs. There can be other reasons why you have started to drop in SERP ranking, and it doesn’t always mean that a Google penalty is the culprit. Competitors may be working harder than you on their SEO and their link building.

Knowing You Have A Manual Penalty

If you want to remove a Google link penalty, you first need to know that you have one. When you get a manual penalty for unnatural links, you will usually get an email and a message on your Google Webmaster Tool. Also, watch out for your SERP rankings drastically dropping, with a sudden and massive reduction in website traffic. The communications you get from Google will include a list of steps that you need to take to remove the penalty. However, if you have a website on the Google Search Console, you will have a slightly different message. It will be on your manual actions sections. Although both of the notes revolve around unnatural links, an email message or Webmaster Tool message will tell you that Google believes there has been an attempt to boost your website’s ranking using artificial and unnatural methods (using a link exchange or buying links). You usually get delivered a message on Google Search Console after discovering bad links that may have been outside your control.

Steps To Link Penalty Removal

If Google has given you a link penalty, and you have obtained this either through black hat strategies or something outside of your control, the process for having that penalty removed is the same. It will involve data collection and outreach, but plenty of tools can help you with both.

The Tools You Need

It’s always best to make use of the following tools and resources, which will dramatically cut down on the time you have to spend removing link penalties and ensuring that you don’t repeat the mistake that earned you those penalties in the first place:

  • Google Search Console
  • Ahrefs
  • Moz Open Site Explorer
  • Google Docs/MS Excel
  • Majestic
  • Notepad++ (or TextWrangler if you’re on an Apple device)
  • Link Detox
  • Screaming Frog
  • Pitchbox

These tools make it a lot easier to find the links causing your trouble and allow you to resolve these issues more efficiently. Each tool will operate slightly differently – browse them all to find the one that works best for your goals and issues.

When using these tools to remove a link penalty, here are the steps that you need to take:

1: Create a list of every backlink that you have

Note that you’ll rarely be 100% certain that you have a comprehensive list of every referral link that you have. Your goal is to list as many as possible, so it’s best to use a combination of the available tools.

  • Google Search Console: It’s always best to start with Google, and their search console is a high-value resource. Log in to Search Console and look at the Menu item ‘Links to your site’. You will be able to download three file types. Click on the ‘More’ item that you see on the ‘Who links the most’ list. Then, click on each option to download the different tables and save them in the CSV format.
  • Moz Open Site Explorer: When it comes to domain authority, it’s hard to beat the exhaustive list of features you get with Moz. If you have an existing account with Moz, head to the Open Site Explorer that lets you see a comprehensive list of backlinks. Manually add your domain address and target root domains before requesting a CSV.
moz
  • Ahrefs: This is the same process as with Moz, except that you should fine-tune your domain-specific list to ‘domain with all its subdomains.’ Select both HTTP and HTTPS versions of those domains and then click on the backlinks menu item. You want to download the fresh and live links.
  • Majestic: Finally, use Majestic. This is updated daily and will give you all of your backlink info from the last 90 days. Download your live links and your historical data to cover all of the bases.

2: Sort those links so that you have a list of the unique ones

You should now have a list of a lot of links in six different types of files. You should have downloaded all of those lists in CSV format. Gather them all into a single file. Excel is the standard file type to use, but Google Sheets has a similar function. Click the Data item on Excel and then the ‘From Text/CSV’ icon.

Open all of your CSV files in Excel and copy all of the referral links that head to your website into Notepad ++. Focus on the URLs at this stage. You should now have a comprehensive file that lists every link. You have likely duplicated information.

In Notepad ++, install the TextFX plugin if you haven’t already, and click the button. The drop-down menu will show you a list. Click the TextFX Tools item and then the ‘Sort lines insensitive (at column)’ before ticking the ‘Sort ascending’ and ‘Sort outputs only UNIQUE (at column) lines’ options. What you have now is a thorough list of the unique backlinks that lead to your website.

3: Sort the list into live links

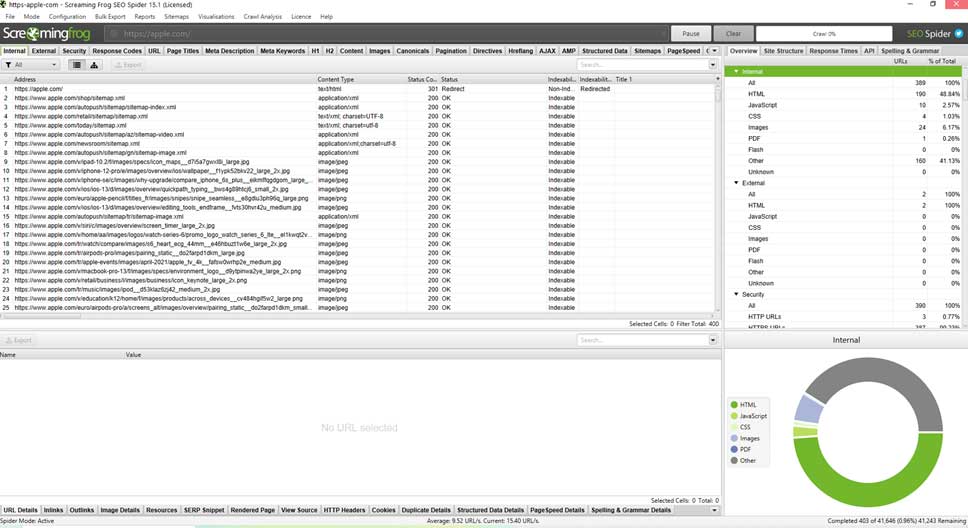
You now need to sort the list you have into live links only. With Majestic, you download the historical links, but they may be older than 90 days, meaning they may not still be live. You can do this manually by checking each backlink and seeing if it still works. The more backlinks that you have, the longer this will take. If you have way too many to do this manually, you need to use Screaming Frog or one of its alternatives.

Screaming Frog

To use Screaming Frog, you first have to configure it to the task that you need. Ensure that you set the mode to ‘List’. Look under the Configuration menu and check the Spider settings. You want to be sure that you set the Limit Crawl Depth on the Limits tab to 0. Then, look at the Advanced tab and manually set the Response Time value to 45 seconds. Also, check that you set the Max Redirects option to 5. Once that’s all done, save your changes and head back to the main window.

Now go back to the Configuration menu and click on the Custom-> Search option. Type in your website domain name, missing out the ‘https://www.’ section. You will now see a list of fields that you need to fill. You can do this manually, but it’s a lot faster to upload the .txt file. Then click start. It can take a while to get the results, so be patient. Once the progress bar has hit 100%, look at your results in the ‘Custom’ tab. You will now have a list of all of your site’s live backlinks (if you want to see which links are not live, you can look in the ‘Internal’ tab). Copy and paste the links into a new .txt file.

4: Upload your list into Link Detox

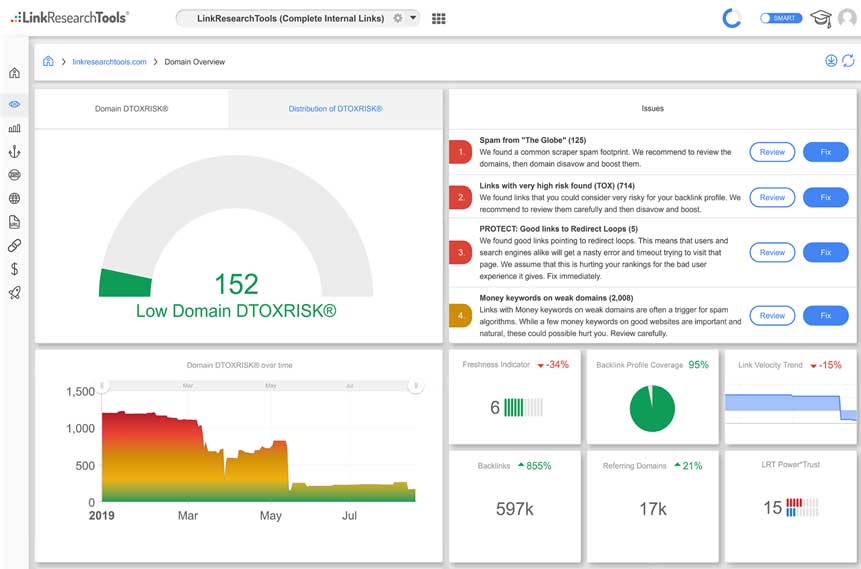
There are many alternatives to Link Detox, but this software comes with the most features and resources. This is the most critical stage of your link penalty removal process, and everything leading up to this step has been prep. Start by inserting your domain into the relevant field. To remove a link penalty, you need to choose the option that analyzes the entire domain. The goal here is to add a no-follow tag to the links that have earned you a link penalty. It’s not only do-follow links that can be harmful, and Google itself is notoriously non-specific about it. That means you should disavow even the no-follow links that you find as well. That will mean a little more work, but it’s the safest option and will make it easier to have your link penalty removed faster.

LinkResearchTools

Start by activating the ‘NOFOLLOW’ evaluation. Then add the message you have received from Google when you get the question ‘Did Google send you a manual spam action or example spam links for the domain?’. Copy and paste the text of the warning email, and then upload your .txt file before double-checking everything is right. If you make a mistake before clicking the ‘Run Detox’ button, you will have to start the whole thing over again, and this may end up costing you money. Once you have hit ‘Run Detox,’ sit back and wait as this can often take a few hours. Once it’s finished, look at your reports using the History tab.

5: Classify your keywords

You want to make it as easy as possible for Link Detox to calculate the potential risk of every link. Open your Link Detox report. You’ll see a warning message that tells you that you need to classify at least 80% of your link’s anchor text to get a more reliable report. You have two options to choose from, manual keyword classification or automatic keyword classification. There is no such thing as being too thorough when it comes to a Google link penalty, so it’s best to classify your keywords manually. Your keywords here will be:

  • Brand name: This is the keyword that only has your brand name or your domain name.
  • Compound: These are the keywords that combine your brand name with your money keywords.
  • Money: These are industry keywords that businesses in your sector want to rank for.
  • Other: These are the keywords used in non-specific links, such as ‘click here,’ ‘find out more,’ or ‘visit our website.’

Click all so that you can classify them at the same time.

6: Use the filters in Link Detox to get a list of live links.

Next, you need to filter out some of your links. You want to filter out three types of links, but you will need to check them later in the process. The link types to filter are:

  • TOX1: Link Detox is a very comprehensive resource, being based on a set of automated rules. One of those rules is TOX1, which is assigned to unindexed sites by Google (whether that’s a technical fault like an incorrect tag or a Google penalty). If Google does not index a domain, disavowing it isn’t going to benefit you in any way.
  • Unverified: These are sites or pages that are not live.
  • Link Not Found: A link may have previously existed, but now Link Detox cannot find it.

Filter these links by the category rules, checking TOX1 and then clicking on the ‘bulk items’ item. This lets you apply the same action on a bulk number of links. So what you’re doing here is disavowing links and rating them as bad. Also, add the tag of ‘website not indexed’ and find all of your unverified links because those sites aren’t live, and they are a waste of time to go through until they do go live. Look at the ‘Tag’ filter and choose the ‘Empty’ option. Then, use the ‘Slice’ function and use the pre-created slice called ‘Unverified Links Only’ while using the bulk option. Finally, select all of the links with no tag, filter the ones with ‘Anchor Text [Link Not Found] and apply the bulk action. You don’t have to disavow or rate these links, so add a ‘link not found’ tag. You’ll need to recheck those non-live links in a few days until they become live.

7: Manually go through the list of links to determine if they are good or bad.

Before getting to this stage, make sure you have read and understood all of Google’s Webmaster Guidelines. You need to know what Google recognizes as good and bad links.

Good links are those that:

  • Come from other web pages that are relevant to your page’s topic. This is because having pages related to each other’s niche ensures that there is a good user experience and that the link has a purpose for being there.
  • Come from trustworthy sites. This is important because the reputation of that website will help boost your own reputation, in the same way that a recommendation will. Additionally, using trustworthy websites instead of spammy or dangerous ones will help protect your users from hazardous activity on the web, and Google will appreciate it. So if you have any links coming from low value, spammy, and potentially fraudulent websites, you’ll want to remove those links as it can cause a penalty.
  • Are inside the content. The placement of your link has a lot of importance to how it performs. If your link is in the footer or sidebar of a website, it won’t carry as much weight as one that appears within the text. These contextual links are much better to use as it reduces the chances of creating duplicate links by accident, which might be a reason for Google to flag it and give you a penalty.
  • Are from long-form content. The reason for this is because this type of content ranks higher than shorter articles. After all, it provides more value to the reader. A list article detailing ten in-depth ways to boost your SEO will benefit more people than a list with just 3 or 5 tips, so you want to get your links on these more extended pieces. Furthermore, Google may view your content as spam if it is too small, believing its sole purpose is to have a link, providing little value.

There are plenty more parameters that make a good link, so be sure to check out the Google guidelines, but by using these parameters, you can look through the list you have created and click thumbs up or down, depending on the quality of each link. This is all done using the Link Detox Screener, which gives you a range of details such as URL, anchor text, status, and risk. Every link will need an action. This will be in the form of:

  • Tagging: This is a good way to show Google that you are making a serious effort into removing their link penalty. Tag each link according to type (forum comment/Web2.0, or a blog comment, for example).
  • Disavow: This is when you want to tell Google that you don’t want them to take a link into account when ranking your pages. However, once you do disavow a link, you can never go back on that, so use it sparingly. You can choose to disavow an entire domain, but be careful not to shoot yourself in the foot by disavowing domains like Pinterest, WordPress, or YouTube.
  • Rating: You can rate a link as either good or bad. You want good links overall.
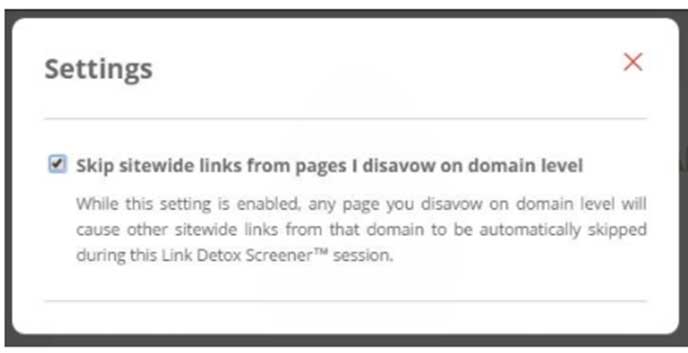
  • Skipping Sitewide Links: You can easily skip over checking links all coming from the same root domain. Click the settings button and confirm that you want to ‘skip sitewide links from pages I disavow on domain level.’
settings

If you’re not 100% sure that a link is good or bad, it’s safer to tag it as bad. You should consider anything that looks suspicious as a bad link, or you’ll be far more likely to fail the link penalty removal application and will have to start the whole process over again. When it takes so long to do in the first place, it isn’t worth the risk.

8: Reach out to website owners and request that they remove bad links.

Before you disavow your bad links, you need to try and have them removed. Depending on how many there are to get rid of, this can be a massive outreach task. That’s why so many business owners use tools like Pitchbox, which has a helpful integration function tool for optimizing mass reach outs. Create a new project in Pitchbox and then go back to Link Detox.

Click on the outreach button of Link Detox to get a full list of the domain names and URLs of the bad links. Insert your email address and get Link Detox to send all of the relevant information straight to Pitchbox. There is a template already in place for requesting bad link removal. If you get a reply saying that they have removed a link, go back to Link Detox and check its status. If so, tag it with ‘Removed using manual outreach.’ This will go a long way to convincing Google to reduce or remove link penalties.

9: Create a report for Google

It would help if you then let Google know you have taken steps to remove the reasons for the penalty. You will need to provide proof in the form of screenshots. This is an optional step in getting a link penalty removed, but it can dramatically speed up the process. Use Google Sheets to create a report and export all of your Link Detox report data. Then, create a report with seven sheets, using those files you have exported from Link Detox. These will be:

  • General information
  • A list of your good links
  • A list of your bad links
  • Unverified links
  • Removed links and ‘Link not found’ details
  • Outreach details from Pitchbox or your manual outreach emails
  • Screenshots of everything from Link Detox, Pitchbox, and any other resources that you have used

10: Non-Removal of a Bad Link

Most website owners remove links when asked. However, if a website owner doesn’t reply to your request for bad link removal or refuses to remove the link, you need to create a list of domains and pages that you want Google to disavow. You can export your disavow file straight from Link Detox. The option to disavow links means if you can’t get them removed, you don’t suffer as a result. Use the Google link disavowal tool to disavow links and remove the association with the bad networks or low-quality links.

11: Submit Your report to Google

Write and submit a reconsideration letter to Google explaining what has happened and what you have done to resolve the issue. This letter should include screenshots and your disavow file. Let them know everything that you’ve done and what the outcome of your actions has been. Include a link to your report in Google Sheets. Remain professional when writing the email, and get someone to cast their eyes over it before sending it.

12: Wait for Google’s reply

Google

You will either get a positive reply from Google or a negative one. If you get a negative reply, then Google has decided that your link penalty will remain in place because they believe that you still have a number of unnatural backlinks. That means starting from step one and going back through the entire process from scratch. A positive response from Google will mean that they have removed your link penalty. However, you may find that your overall performance on SERPs has dropped. Since being tagged as a website with unnatural links, the search engine will view you less favorably. If you want to regain your previous status, you’re going to have to work hard on a new link building and monitoring strategy.

This can all take time. Gathering the required information and taking the right steps is only part of the process. It can take Google a few days to even several weeks to reply. The waiting period will depend on how many referrals links you have. It may be that you have to go through the 12 steps multiple times before Google will remove the penalty. You must remember to take screenshots of everything that you do to resolve the issue. Google will want to see those screenshots as proof that you are doing everything you can to get rid of the link penalty.

Conclusion

A Google penalty can devastate your entire backlinking campaign and make your SEO efforts as a whole worthless. This means that it’s vital that you limit your use of black hat SEO techniques to prevent this from happening to you and instead utilize methods that adhere to the guidelines of Google.

As well as this, if you get a penalty, you need to act quickly to limit its effects. These steps should help you get out of this challenging situation and recover swiftly from the ordeal. Be sure to follow them in great detail, as the process can be complicated, and getting it wrong can set you back on time and money. Getting a Google penalty is one of the most devastating things that can happen on the internet, but with this guide’s knowledge, you can overcome this setback and make your link building and SEO even stronger.